

Welcome to the Honeywell Pro 5000 installation guide. This manual provides step-by-step instructions for installing the FocusPRO 5000 Series Non-Programmable Digital Thermostat, ensuring a seamless setup process.
1.1 Overview of the Honeywell Pro 5000 Thermostat
The Honeywell Pro 5000 is a non-programmable digital thermostat designed for simplicity and efficiency. It is part of the FocusPRO 5000 Series, offering compatibility with various HVAC systems, including conventional and heat pump configurations. This thermostat is known for its user-friendly interface and straightforward installation process. It operates on AA alkaline batteries, ensuring reliable performance without hardwiring. The Pro 5000 features a sleek design and is built to provide accurate temperature control. Its compatibility with multiple system types makes it a versatile choice for homeowners. The thermostat is also backed by a 5-year limited warranty, covering defects in workmanship and materials. It is an ideal solution for those seeking a dependable and easy-to-use temperature control system.
1.2 Importance of Proper Installation
Proper installation of the Honeywell Pro 5000 thermostat is crucial for ensuring optimal performance, safety, and energy efficiency. Incorrect wiring or mounting can lead to system malfunctions, increased energy bills, or even damage to the thermostat or HVAC system. A well-executed installation ensures accurate temperature control, efficient operation, and longevity of the device. Additionally, proper setup is essential for activating special features like auxiliary heat and compressor protection. Improper installation may also void the product warranty. Following the step-by-step instructions in this manual guarantees a safe and reliable setup, maximizing the benefits of the Honeywell Pro 5000 thermostat for years to come.

System Requirements and Compatibility
The Honeywell Pro 5000 is compatible with conventional and heat pump systems, supporting 1 Heat/1 Cool configurations. Proper system configuration ensures optimal performance and functionality.
2.1 Checking System Compatibility
Before installing the Honeywell Pro 5000, ensure your HVAC system is compatible. The thermostat works with conventional and heat pump systems, supporting 1 Heat/1 Cool configurations. Verify your system type and configuration to match the thermostat’s capabilities. For heat pumps, check the auxiliary heat activation compatibility. Refer to the manual for specific model compatibility, such as the TH5110D for 1 Heat/1 Cool systems. Proper system matching ensures optimal performance and avoids installation issues. Always consult the official Honeywell documentation or contact support if unsure about compatibility.
2.2 Understanding System Types (Conventional, Heat Pump)
The Honeywell Pro 5000 is compatible with both conventional and heat pump systems. Conventional systems typically include a furnace or air conditioner, while heat pumps provide both heating and cooling. Understanding your system type is crucial for proper installation. For heat pumps, ensure the thermostat supports auxiliary heat activation, which may be required in extreme cold. The Pro 5000 works with 1 Heat/1 Cool configurations, making it suitable for most standard setups. Always verify your system type before proceeding with installation to ensure compatibility and optimal performance. Refer to the manual for specific guidelines tailored to your system type.

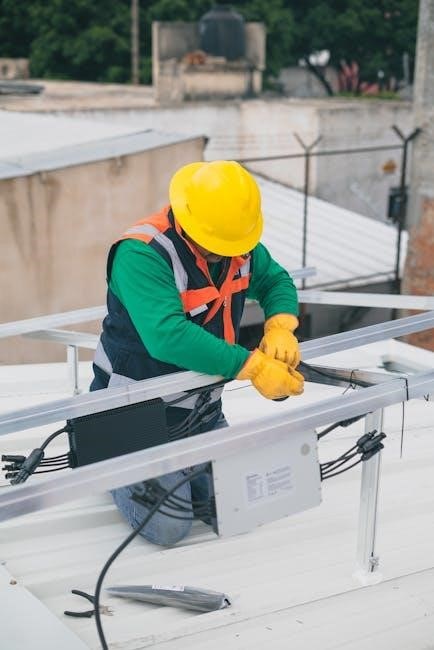
Pre-Installation Steps
Begin by removing the old thermostat and mounting the wallplate. Follow the provided instructions for proper alignment and secure installation to ensure a stable base for the new thermostat.
3;1 Removing the Old Thermostat
To begin, switch off the power to your HVAC system at the circuit breaker or fuse box to ensure safety. Next, carefully remove the old thermostat from the wall by gently pulling it away. This will expose the wires connected to the wallplate. Take note of the wire labels or colors to ensure proper reconnection later. If the wires are not labeled, consider taking a photo or marking them with tape. Once the thermostat is detached, disconnect the wires from the old wallplate. If the wallplate is damaged or outdated, it may need to be replaced. Properly dispose of the old thermostat and any unnecessary components. This step ensures a clean and safe installation process for the Honeywell Pro 5000 thermostat.
3.2 Mounting the Wallplate
Before mounting the wallplate, ensure the area is clean and free of debris. Use a level to confirm the wallplate is straight. If your wallplate has an adhesive backing, peel it off and press firmly onto the wall. For walls without drywall anchors, use the provided screws and anchors to secure the wallplate. Align the wallplate with the wiring configuration from the old thermostat. Gently tighten the screws to avoid damaging the wall or the wallplate. Once mounted, ensure the wallplate is level and securely attached. This step is crucial for proper thermostat functionality. If the wallplate is damaged, replace it with a new one (Part No. 50002883-001) before proceeding. Proper mounting ensures a stable base for the Honeywell Pro 5000 thermostat installation.

Wiring the Honeywell Pro 5000
Wiring the Honeywell Pro 5000 involves connecting the thermostat to your HVAC system. Follow the step-by-step guide for conventional or heat pump systems to ensure precise connections.
4.1 Wiring Conventional Systems
Wiring the Honeywell Pro 5000 for conventional systems requires careful connection of terminals. The R terminal connects to the heating system’s power, while W controls heat. The Y terminal is for cooling, and G operates the fan. Ensure the C terminal is connected for proper thermostat operation. If your system lacks a C wire, use a jumper between R and C. Always turn off power at the circuit breaker before starting. Incorrect wiring can damage the thermostat or HVAC system. Refer to the manual for specific terminal assignments and double-check connections to avoid errors. Proper wiring ensures reliable performance and safety. Follow the step-by-step guide for a secure setup.
4.2 Wiring Heat Pump Systems
Wiring the Honeywell Pro 5000 for heat pump systems involves connecting specific terminals to ensure proper operation. The R terminal connects to the power source, while W controls auxiliary heat. The Y terminal is for cooling, and G operates the fan. For heat pumps, the O or B terminal is used to activate the reversing valve, which switches between heating and cooling modes. Ensure the C terminal is connected for continuous power. If your system lacks a C wire, install a jumper between R and C. Always disconnect power at the circuit breaker before wiring. Incorrect connections can damage the system or thermostat. Refer to the manual for terminal assignments and verify connections for reliable performance and safety.
Thermostat Installation
Mount the Honeywell Pro 5000 thermostat by aligning it with the wallplate and securing it firmly. Ensure proper alignment for level installation and functionality.
5.1 Mounting the Thermostat
Mounting the Honeywell Pro 5000 thermostat begins with removing the wallplate from the thermostat. Ensure the wallplate is properly aligned and secured to the wall. Use a level tool to confirm the wallplate is straight for accurate installation. Once the wallplate is mounted, carefully attach the thermostat to it by aligning the tabs on the thermostat with the slots on the wallplate. Gently push the thermostat onto the wallplate until it clicks into place; Ensure the thermostat is firmly secured and level. Avoid touching the screen during installation to prevent damage. If necessary, adjust the thermostat’s position for proper alignment and functionality.
5.2 Connecting the Wires
Connecting the wires to the Honeywell Pro 5000 thermostat is a critical step. Ensure the power to your HVAC system is turned off before proceeding. Match the wires from your system to the appropriate terminals on the thermostat. For conventional systems, connect the R (red) wire to the R terminal and the W (white) wire to the W terminal. The Y (yellow) wire connects to the Y terminal, and the G (green) wire to the G terminal. For heat pump systems, follow the same process but ensure the O/B wire is connected correctly. Use a screwdriver to secure the wires firmly in their terminals. Avoid over-tightening to prevent damage. Once all wires are connected, proceed to test the system to ensure proper functionality.

Power Options
The Honeywell Pro 5000 offers flexible power options, including AC power installation and battery operation. It uses AA alkaline batteries, ensuring reliable performance. A 5-year warranty covers the product, excluding the battery.
6.1 AC Power Installation
AC power installation for the Honeywell Pro 5000 ensures a reliable energy supply. The thermostat must be connected to a 24V AC power source, typically from your HVAC system. Proper wiring is essential to avoid damage or malfunction. The installation should only be performed by a qualified technician to ensure safety and compliance with local regulations. The system supports both conventional and heat pump configurations, making it versatile for various setups. Always refer to the official manual for specific wiring diagrams and instructions. Improper installation can void the warranty or cause operational issues. The 5-year limited warranty covers defects in workmanship and materials, excluding the battery. Follow all safety precautions during installation to ensure optimal performance and longevity of the device.
6.2 Battery Installation and Maintenance
The Honeywell Pro 5000 thermostat requires two AA alkaline batteries for operation when AC power is not available. To install, locate the battery compartment on the back of the thermostat and insert the batteries, ensuring correct polarity. The “REPLACE BATTERY” warning will flash when the batteries are low. Replace them promptly to maintain functionality. Use high-quality alkaline batteries for optimal performance. Avoid mixing old and new batteries or using rechargeable types. If the low-battery warning is ignored, the system may shut down, requiring a reset. Battery maintenance is crucial for uninterrupted operation. The 5-year warranty does not cover battery-related issues. Always follow the manufacturer’s guidelines for installation and maintenance to ensure reliability and longevity of the device.
Testing the System
After installation, perform an initial system test to ensure proper functionality. Verify heating, cooling, and auxiliary heat activation. Check for the “REPLACE BATTERY” warning and compressor protection during testing. If issues arise, consult the troubleshooting guide in the manual for detailed solutions and ensure all connections are secure for optimal performance.
7.1 Initial System Test
After completing the installation, perform an initial system test to ensure the Honeywell Pro 5000 operates correctly. Start by turning on the power and checking the display for proper functionality. Test both heating and cooling modes to confirm the system responds accurately. Verify that the auxiliary heat activates when needed and that the compressor protection feature engages as specified. Observe the thermostat’s display for any error messages or warnings, such as the “REPLACE BATTERY” alert. If issues arise, refer to the troubleshooting section in the manual. Allow a few minutes between tests to ensure accurate results. This step ensures all components are working harmoniously before finalizing the setup.
7.2 Troubleshooting Common Issues
Common issues during Honeywell Pro 5000 installation may include display malfunctions, system response delays, or error messages like “REPLACE BATTERY.” If the display is blank, check power connections and ensure batteries are installed correctly. For delayed responses, verify wiring accuracy and system compatibility. If the auxiliary heat or compressor protection features malfunction, consult the manual to ensure proper configuration. Reset the thermostat by removing batteries for 30 seconds if issues persist. Refer to the troubleshooting guide in the manual for specific solutions. If problems remain unresolved, contact Honeywell customer support for assistance. Always follow safety precautions and manufacturer guidelines when addressing electrical or system-related issues.
Special Functions and Features
The Honeywell Pro 5000 features auxiliary heat activation for enhanced warmth and compressor protection to prevent damage, ensuring efficient and safe system operation year-round.
8.1 Auxiliary Heat Activation
The Honeywell Pro 5000 thermostat includes an auxiliary heat activation feature, which engages additional heating sources when the primary system cannot maintain the desired temperature. This function is particularly useful in colder climates or during extreme temperature drops. The auxiliary heat kicks in automatically when the system detects that extra warmth is needed to reach the setpoint. Users can also manually activate this feature through the thermostat settings if required. Proper installation ensures this feature works efficiently, providing consistent comfort while preventing overwork on the primary heating system. Always refer to the manual for specific activation instructions or contact Honeywell support for assistance.
8.2 Compressor Protection
The Honeywell Pro 5000 thermostat features a compressor protection mechanism designed to prevent damage to the system’s compressor. This feature ensures a minimum off-cycle time, typically 5 minutes, between cooling cycles to avoid overheating or excessive wear. During installation, it’s essential to configure this setting correctly to maintain system efficiency and longevity. The compressor protection is automatically enabled in most setups but can be adjusted through advanced settings if needed. Proper configuration ensures the compressor operates within safe parameters, extending its lifespan and preventing costly repairs. Always refer to the installation manual for specific instructions on configuring this feature for your system type.

Technical Specifications
The Honeywell Pro 5000 features a 5-year limited warranty, excluding the battery; It uses 2 AA alkaline batteries and supports both conventional and heat pump systems, ensuring compatibility and reliability.
9.1 Product Specifications
The Honeywell Pro 5000 thermostat is designed for non-programmable digital operation, offering precise temperature control. It operates on 2 AA alkaline batteries, providing reliable power without hardwiring. The device supports both conventional and heat pump systems, ensuring versatility for various HVAC setups. With a backlit display, it offers clear visibility in low-light conditions. The thermostat is compatible with 1 Heat/1 Cool and heat pump systems, making it suitable for diverse applications. It features auxiliary heat activation and compressor protection, enhancing system efficiency and longevity. The product dimensions and weight are optimized for easy installation. The Honeywell Pro 5000 is backed by a 5-year limited warranty, excluding the battery, ensuring customer satisfaction and durability.
9.2 Warranty Information
The Honeywell Pro 5000 thermostat is backed by a 5-year limited warranty, ensuring defect-free performance under normal use. This warranty covers workmanship and materials, excluding the battery, from the date of purchase. Proper installation by a qualified technician is required to maintain warranty validity. Honeywell stands behind its products, offering reliable solutions for home comfort. The warranty underscores the company’s commitment to quality and customer satisfaction. For detailed warranty terms, refer to the official documentation or contact Honeywell support. This assurance provides peace of mind, knowing your investment is protected for years to come.
Customer Assistance and Support
For assistance, contact Honeywell Support or visit their website. Replacement parts, like cover plate assembly (Part No. 50002883-001), are available through authorized distributors, ensuring quick resolution for any issues.
10.1 Contacting Honeywell Support
For any inquiries or issues with your Honeywell Pro 5000 installation, contact Honeywell Support directly. Visit their official website and navigate to the “Contact Us” section for assistance. You can also reach their customer service team via phone for troubleshooting or replacement part orders. Ensure to have your product details, such as the model number and part numbers like 50002883-001, ready for efficient support. Honeywell provides a 5-year limited warranty, excluding batteries, covering defects in workmanship and materials. Their team is available to address installation challenges, wiring issues, or any other concerns related to your thermostat. For quick solutions, refer to the official Honeywell Pro 5000 installation manual or their online resources.
10.2 Ordering Replacement Parts
To order replacement parts for your Honeywell Pro 5000 thermostat, visit the official Honeywell website or contact their customer support. Use the provided part numbers, such as 50001137-001 or 50002883-001, to ensure accuracy. You can also reach out to authorized distributors for genuine components. Honeywell offers a 5-year limited warranty, excluding batteries, covering defects in materials and workmanship. For returns or repairs, ship items to Honeywell Return Goods, Dock 4 MN10-3860, 1885 Douglas Dr. Always verify warranty terms and conditions before placing orders. Proper documentation and proof of purchase may be required for warranty claims or replacements. Ensure all parts are installed by a qualified technician to maintain system performance and safety.
Installing the Honeywell Pro 5000 thermostat is a straightforward process when following the provided manual. Proper installation ensures optimal performance, energy efficiency, and comfort. Always refer to the official manual for detailed guidance. If issues arise, troubleshooting sections and customer support are available to assist. Remember to maintain your system regularly and replace parts only with genuine components. For warranty claims or replacements, contact Honeywell support or authorized distributors. Ensure all installations and repairs are performed by qualified technicians to guarantee safety and efficiency. With these steps, your Honeywell Pro 5000 will provide reliable temperature control for years to come.