
Discover how to effectively use and maintain your older Jenn-Air self-cleaning oven with this comprehensive guide, ensuring optimal performance and longevity through proper care and cleaning techniques․
1․1 What is a Jenn-Air Self-Cleaning Oven?
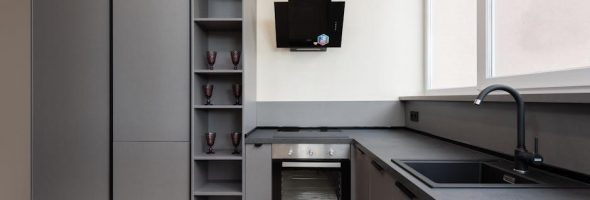
A Jenn-Air self-cleaning oven is a high-end appliance designed to simplify cooking and maintenance․ It features a built-in self-cleaning function that uses high temperatures to burn food residue, leaving a light ash that’s easy to wipe away․ Older models, while robust, may differ slightly from modern versions in features and technology․ These ovens are known for their durability and advanced cooking capabilities, making them a popular choice for homeowners seeking convenience and efficiency․ Regular maintenance is essential to ensure optimal performance and longevity, especially in older units․
1․2 Importance of Proper Maintenance
Proper maintenance is crucial for ensuring the longevity and efficiency of your older Jenn-Air self-cleaning oven․ Regular cleaning prevents food residue buildup, which can interfere with the self-cleaning function and affect cooking performance․ Neglecting maintenance may lead to stubborn stains, unpleasant odors, and potential damage to internal components․ Additionally, a well-maintained oven ensures safety by preventing gas leaks or electrical issues․ By following a consistent cleaning schedule, you can preserve the oven’s appearance, maintain its advanced features, and ensure it continues to perform optimally for years to come․
Understanding the Self-Cleaning Feature
The self-cleaning feature uses high heat to reduce food residue to ash, simplifying cleanup․ This convenient option ensures a thorough clean without harsh chemicals, maintaining your oven’s performance and hygiene․
2․1 How the Self-Cleaning Cycle Works
The self-cleaning cycle uses high heat, typically between 800°F and 1000°F, to burn food residue into ash․ The oven door locks during this process to ensure safety․ Once activated, the cycle runs for several hours, depending on soil level․ After completion, the oven cools, and the ash can be easily wiped away․ This feature eliminates the need for harsh chemicals, making cleaning efficient and eco-friendly․ Proper preparation, like removing racks, is essential for optimal results․ Always follow manufacturer guidelines to avoid damage or safety hazards during the cycle․
2․2 Types of Self-Cleaning Cycles Available
Older Jenn-Air self-cleaning ovens often feature multiple cycle options, including light, medium, and heavy-duty cleaning modes․ The light cycle is ideal for minor food residue, while the heavy-duty option tackles tough, baked-on grime․ Some models may also include a quick-clean or steam cleaning function for faster results․ Each cycle adjusts temperature and duration based on the selected intensity․ The automatic door lock ensures safety during high-heat cleaning․ Always consult your manual to confirm the specific cycles available on your model and follow guidelines for optimal performance and maintenance․
Preparing the Oven for Self-Cleaning
Preparing your older Jenn-Air oven for self-cleaning involves removing racks, shielding the floor from debris, and ensuring the area around the oven is clear for safety and efficiency․
3․1 Steps to Prepare the Oven for Cleaning
To prepare your older Jenn-Air oven for self-cleaning, start by removing all racks, shelves, and accessories․ Cover the floor with a heat-resistant mat or foil to catch debris․ Scrape off large food particles using a soft brush or plastic scraper to prevent smoke during cleaning․ Ensure no racks or utensils remain inside, as they may damage the oven․ Open nearby windows for ventilation and confirm the oven is empty before proceeding․ This setup ensures a safe and effective cleaning process․
3․2 Removing Oven Racks and Accessories
Before starting the self-cleaning cycle, remove all oven racks, shelves, and accessories․ Turn off the oven and let it cool slightly to avoid burns․ Use oven mitts to carefully pull out racks, as they may still be hot․ Place them on a heat-resistant surface or wrap in foil for cleaning later․ Ensure no utensils or cookware remain inside, as they may damage the oven during high-heat cleaning․ This step ensures a thorough cleaning and prevents potential damage to racks or accessories․
Safety Precautions
Ensure the oven is cool before cleaning․ Use oven mitts when handling racks․ Keep the kitchen well-ventilated during the self-cleaning cycle․ Avoid using abrasive cleaners, as they can damage the finish․ Always keep children away from the oven while it is in use․
4․1 Important Safety Tips Before Starting
- Always disconnect power to the oven before cleaning to avoid electrical hazards․
- Remove all racks and accessories to prevent damage during the cycle․
- Ensure the oven is completely cool before starting the self-cleaning process․
- Keep children and pets away from the oven during cleaning․
- Protect surrounding surfaces with heat-resistant mats or newspaper․
- Avoid using abrasive cleaners or scouring pads on the exterior․
- Never leave the oven unattended while the self-cleaning cycle is running․
4․2 Ventilation Requirements During Cleaning
Proper ventilation is crucial during the self-cleaning cycle to remove fumes and odors․ Open windows and doors to ensure good airflow․ Use exhaust fans to circulate air and prevent fumes from lingering indoors․ Avoid inhaling harsh fumes by staying out of the kitchen during the cycle․ If the smell is overwhelming, temporarily vacate the area․ Keep pets and sensitive individuals away․ Ensure vents are clear and functioning properly․ For older models, ventilation needs may vary, so monitor the process closely․ Always follow manufacturer guidelines for optimal ventilation to ensure safety and effectiveness․
Starting the Self-Cleaning Cycle
Locate the control panel, select the self-clean option, and choose the desired cycle․ Set the timer and temperature as needed, then press start to begin the process․
5․1 Locating and Using the Control Panel
The control panel on your older Jenn-Air self-cleaning oven is typically located on the front or top of the oven․ It features buttons or knobs for selecting cleaning modes, temperature, and timer settings․ Identify the self-clean option, usually marked clearly, and press or turn the corresponding control․ Use the display screen, if available, to confirm your selections․ Navigate through the menu by pressing arrows or rotating knobs to set the desired cycle․ Always ensure the oven is empty and prepared before starting․ Refer to your manual for specific button layouts and functions if unsure․
5․2 Setting the Timer and Temperature
To set the timer and temperature for the self-cleaning cycle, locate the control panel buttons or knobs․ Select the self-clean mode, then choose the cycle duration, typically 2-4 hours, depending on soil level․ Use the arrows or dial to adjust the timer and temperature settings․ Ensure the oven is empty and racks are removed before starting․ Once set, press “Start” to begin the cycle․ The oven will lock automatically for safety․ Keep the kitchen well-ventilated during the process․ After the cycle completes, allow the oven to cool before wiping down․ Always refer to your manual for specific timing and temperature recommendations․

Monitoring the Cleaning Process
Monitor the self-cleaning cycle by checking the progress through the oven window․ Ensure the oven remains locked during cleaning and avoid opening it until the cycle completes․
6․1 Understanding the Cleaning Cycle Duration
The self-cleaning cycle on older Jenn-Air ovens typically lasts between 2 to 4 hours, depending on the soil level and selected temperature․ The oven heats to extreme temperatures, burning food residue into ash․ The duration varies based on the cycle chosen—light, medium, or heavy-duty cleaning․ It’s essential to allow the cycle to complete without interruption for optimal results․ Always start the process when you’re not in a hurry, as the oven will remain hot and require cooling before wiping down․ Refer to your manual for specific cycle times tailored to your model․
6․2 Observing Safety During the Cycle
Always prioritize safety when running the self-cleaning cycle on your older Jenn-Air oven․ Keep children and pets away, as the oven reaches extremely high temperatures․ Never open the oven door during the cycle, as intense heat and fumes can cause burns or discomfort․ Ensure proper ventilation by opening windows or turning on exhaust fans to prevent the buildup of harmful fumes․ Avoid using abrasive cleaners or scouring pads during or after the cycle, as they can damage the oven’s finish․ Stay in the kitchen to monitor the process and ensure everything runs smoothly․ Let the oven cool completely before wiping down․
Post-Cleaning Procedures
After the self-cleaning cycle, allow the oven to cool completely․ Wipe away ash with a damp cloth and rinse thoroughly․ Ensure all surfaces are clean and dry before next use․
7․1 Allowing the Oven to Cool Down
After the self-cleaning cycle, it’s crucial to let the oven cool completely․ This prevents damage to the finish and ensures safety․ The oven remains extremely hot, so avoid touching it․ Allow at least 2-3 hours for cooling, depending on your model․ Keep children and pets away during this time․ Do not attempt to wipe or clean the oven while it’s still hot․ Once cooled, the oven is ready for manual cleaning or regular use․ Always prioritize safety and patience during the cooling process to avoid accidents and maintain your oven’s longevity․
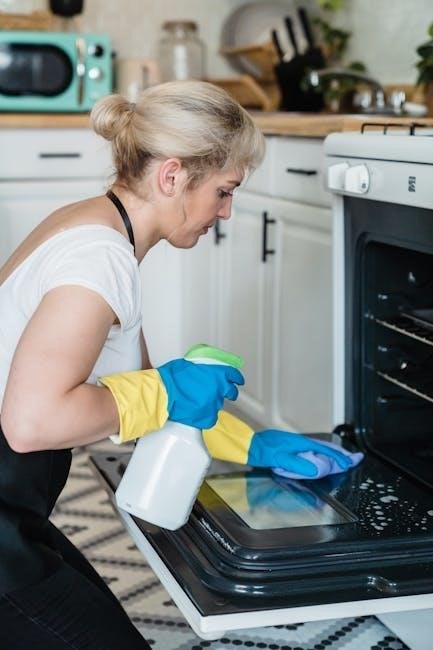
7․2 Wiping Down the Oven Interior
Once the oven has cooled, use a damp cloth or sponge to wipe down the interior․ This step removes any remaining ash or residue․ Avoid using harsh chemicals, as they can damage the finish․ For tougher spots, a mild soap solution can be used, but rinse thoroughly․ Wipe in the direction of the oven’s finish to prevent scratching․ Remove racks and place them in soapy water for cleaning․ Dry the interior with a clean towel to prevent water spots․ This final step ensures your oven is clean, safe, and ready for its next use․
Cleaning the Oven Window
Cleaning the oven window ensures clear visibility during cooking․ Use a glass cleaner or vinegar solution to remove grime and streaks, maintaining a spotless appearance․
8․1 Removing Tough Stains from the Window
Tackle stubborn stains on your Jenn-Air oven window with a baking soda and water paste․ Apply the mixture, let it sit, then scrape gently with a soft brush or plastic scraper․ Avoid harsh chemicals or abrasive materials that could scratch the glass․ For baked-on grime, mix equal parts white vinegar and water in a spray bottle․ Spray, let it sit, and wipe clean with a lint-free cloth․ Regular cleaning prevents stains from building up, ensuring clear visibility during cooking․ Always wear gloves and work on a cool oven surface for safety․
8․2 Polishing the Window for Clarity
For a streak-free shine, polish your Jenn-Air oven window using a microfiber cloth and a non-abrasive glass cleaner․ Avoid harsh chemicals or scrubbers that could scratch the surface․ Apply the cleaner evenly, then wipe in circular motions to remove any residue or streaks․ For a sparkling finish, buff the window with a dry microfiber cloth․ Regular polishing maintains clarity and visibility, making it easier to monitor cooking progress․ Always clean when the oven is cool to prevent glass damage․ This simple step ensures your oven window remains clear and functional for years to come․
Exterior Cleaning
Regularly clean your Jenn-Air oven’s exterior to maintain its appearance and functionality․ Wipe surfaces with a microfiber cloth and mild detergent, avoiding abrasive cleaners that may damage finishes․
9․1 Cleaning the Oven Door and Handle
Clean the oven door and handle regularly to remove grease and food residue․ Use a mild detergent and warm water, avoiding abrasive cleaners that may scratch surfaces․ For tough stains, mix baking soda and water to create a paste, applying it to the affected areas․ Let it sit before wiping clean with a damp cloth․ The handle can be cleaned with a gentle multipurpose cleaner․ Avoid using harsh chemicals or scrubbers, as they may damage the finish․ Regular cleaning ensures a polished appearance and prevents grime buildup․
9․2 Polishing Stainless Steel Surfaces
Polishing stainless steel surfaces on your older Jenn-Air oven enhances its appearance and maintains its durability․ Use a microfiber cloth and a stainless steel cleaner or olive oil to remove fingerprints and smudges․ Avoid harsh chemicals or abrasive materials that can scratch the surface․ Apply the cleaner in a circular motion, then buff with a dry cloth for a shiny finish․ For tougher marks, mix equal parts water and white vinegar, apply with a soft cloth, and wipe clean․ Regular polishing prevents grime buildup and keeps the exterior looking like new, ensuring long-lasting aesthetics and functionality․
Manual Cleaning as an Alternative
Manual cleaning is a practical alternative for lighter messes or when the self-cleaning feature isn’t needed․ It ensures a safe, effective way to maintain your oven’s condition without extreme heat․
10․1 When to Choose Manual Cleaning
Manual cleaning is ideal for lighter messes, such as small food spills or splatters, or when you prefer to avoid the high heat of the self-cleaning cycle․ It’s also a good option if you need immediate results, as self-cleaning cycles can take several hours․ Additionally, manual cleaning is recommended for maintaining the oven between self-cleaning sessions or for delicate surfaces that might be damaged by extreme temperatures․ Regular manual cleaning can prevent tough residue buildup, making future cleaning tasks easier and ensuring your oven remains in excellent condition for years to come․
10․2 Steps for Manual Cleaning
Start by turning off and allowing the oven to cool completely․ Remove racks and accessories, washing them separately․ Put on gloves and mix a natural cleaner like baking soda and water to create a paste․ Apply the paste to interior surfaces, avoiding heating elements․ Let it sit overnight, then wipe down with a damp cloth․ Scrub stubborn stains with a non-abrasive sponge․ Rinse thoroughly and dry with a clean towel․ Clean racks and replace them before using the oven again․ This method is gentle yet effective for maintaining your oven’s condition without high heat․

Maintenance and Upkeep
Regular maintenance ensures your Jenn-Air oven performs optimally․ Schedule routine cleaning, inspect door seals, and check heating elements․ Replace worn parts promptly to maintain efficiency and safety․
11․1 Regular Cleaning Schedule
Establishing a regular cleaning schedule is essential for maintaining your older Jenn-Air self-cleaning oven․ Clean light food spills immediately to prevent hardening․ Run the self-cleaning cycle every 2-3 months for heavy buildup․ For lighter maintenance, wipe down the oven walls and floor with a damp cloth after each use․ Remove racks and shelves monthly for a thorough scrub․ Clean the oven window regularly to maintain visibility․ Avoid using harsh chemicals, as they may damage older finishes․ Consistency in cleaning ensures optimal performance and prevents grime from becoming stubborn over time․
11․2 Checking and Replacing Oven Parts
Regularly inspect your older Jenn-Air oven’s parts to ensure functionality․ Check oven racks for wear and replace if rusted or damaged․ Inspect the door seal for cracks or gaps, as a faulty seal can reduce efficiency․ Examine heating elements for signs of damage or corrosion and replace them if necessary․ Additionally, check the oven light and replace the bulb if it’s dim or burnt out․ Refer to your user manual for compatible replacement parts․ Always turn off power before performing inspections or replacements to ensure safety and avoid electrical hazards․
Troubleshooting Common Issues
Identify and resolve issues promptly to maintain your oven’s performance․ Check error codes on the display for guidance․ If the oven doesn’t heat, ensure power is on and settings are correct․ Consult your manual for solutions or contact Jenn-Air support for assistance․
12․1 Identifying Common Problems
Older Jenn-Air self-cleaning ovens may experience issues like error codes, uneven heating, or a faulty self-cleaning cycle․ Check for malfunctioning heating elements, a broken thermostat, or a defective door lock․ If the oven doesn’t start, ensure the power supply is stable and the controls are functioning․ Strange noises or a non-responsive control panel may indicate electrical issues․ Addressing these problems early prevents further damage․ Always refer to your manual for specific error code meanings and basic troubleshooting steps before seeking professional help․
12․2 Resetting the Oven After a Power Outage
After a power outage, your older Jenn-Air oven may require a reset․ First, ensure the oven is turned off and allow it to cool․ Check your circuit breaker or fuse box to confirm the power supply is restored․ Plug in the oven if it was unplugged․ Locate the control panel and press the “Cancel” or “Off” button to reset the oven․ Some models may require holding the “Cancel” button for a few seconds․ Refer to your manual for specific reset instructions, as procedures may vary․ Once reset, test the oven by running a short cleaning or baking cycle to ensure proper function․
Error Codes and Solutions
Understand and resolve common error codes on your older Jenn-Air oven, such as F1 or F2, by resetting the oven or checking power connections․ Consult your manual for specific solutions or contact Jenn-Air support for assistance with persistent issues․
13․1 Understanding Error Codes
Error codes on older Jenn-Air ovens are designed to help diagnose issues quickly․ Codes like F1, F2, or F3 indicate specific problems, such as a faulty temperature sensor or overheating․ These codes simplify troubleshooting by pointing directly to the source of the issue․ Always refer to your oven’s user manual for a detailed explanation of each code, as they vary by model․ Understanding these codes allows you to address problems efficiently, whether it’s a sensor malfunction or a power-related issue․ Keep the manual handy for quick reference when an error code appears․
13․2 Resetting Error Codes
Resetting error codes on older Jenn-Air ovens is often straightforward․ Start by turning the oven off and unplugging it for 30 seconds to reset the control board․ Plug it back in and turn it on to see if the error clears․ If the code persists, check the user manual for specific reset procedures, as some models may require pressing and holding certain buttons․ If the issue remains unresolved, contact Jenn-Air support or a professional technician․ Always ensure the oven is cool before attempting any reset or maintenance to avoid injury or further damage․
Tips for Optimal Use
Preheat your Jenn-Air oven to the correct temperature before cooking for consistent results․ Avoid overcrowding racks to ensure even heat distribution and prevent food from steaming instead of browning; Always use oven-safe cookware and place heavier dishes on lower racks for stability․ Regularly check and adjust oven settings to maintain accuracy․ For baking, use the convection setting to enhance airflow and achieve crisp textures․ Clean spills immediately to prevent them from hardening and interfering with future cooking performance․ These habits will help extend the life of your oven and ensure reliable operation․
14․1 Best Practices for Self-Cleaning
For optimal results, run the self-cleaning cycle when the oven is heavily soiled but not clogged․ Avoid using abrasive cleaners beforehand, as they can leave residue․ Always remove racks and accessories to prevent discoloration․ If your oven has a lock, ensure it is securely closed before starting the cycle․ Keep the kitchen well-ventilated to avoid fumes․ For lighter messes, consider a shorter cycle to conserve energy․ After cleaning, wipe down the interior while still warm to remove ash easily․ Regular self-cleaning maintains oven efficiency and prevents grime buildup․ Follow these practices to keep your Jenn-Air oven in prime condition․
14․2 Avoiding Common Mistakes
To ensure safe and effective self-cleaning, avoid common pitfalls․ Refrain from using harsh chemicals or abrasive cleaners, as they can damage the oven’s finish․ Never leave the oven door open during the cycle, as extreme heat can escape․ Avoid interrupting the cycle once it starts, as this may require a full reset․ Do not forget to remove all racks and accessories, as they may warp or discolor․ Keep children and pets away during cleaning due to high temperatures․ Always refer to your user manual for specific guidance, as settings may vary․ By avoiding these mistakes, you’ll maintain your oven’s performance and longevity․
Mastering your older Jenn-Air self-cleaning oven’s use and maintenance ensures optimal performance and longevity․ By following these guidelines, you’ll enjoy a cleaner, more efficient cooking experience for years․
15․1 Summary of Key Instructions
This guide provides a comprehensive approach to using and maintaining your older Jenn-Air self-cleaning oven․ From understanding the self-cleaning feature to post-cleaning procedures, it covers essential steps to ensure optimal performance․ Proper preparation, safety precautions, and regular maintenance are emphasized to prolong the oven’s longevity․ By following the outlined instructions, you can effectively manage the self-cleaning cycle, address common issues, and keep your oven in excellent condition․ Remember to always refer to your user manual for model-specific details and avoid common mistakes to ensure a cleaner, safer, and more efficient cooking experience․
15․2 Final Tips for Longevity
To ensure your older Jenn-Air self-cleaning oven lasts for years, avoid using abrasive cleaners and harsh chemicals, as they can damage the finish․ Regularly inspect and clean the venting system to maintain proper airflow․ Avoid overheating, as excessive temperatures can strain components․ For manual cleaning, use gentle products and soft cloths to prevent scratching․ Always follow the recommended self-cleaning cycle times to avoid wear on the heating elements․ Lastly, address error codes promptly and store oven racks separately to prevent scratching the interior․ By combining these practices, you’ll preserve your oven’s performance and extend its lifespan effectively․